Strategic Window Placement: Performance, Not Just Aesthetics
Window placement affects heating costs, cooling loads, natural light quality, and how spaces feel. Getting it right requires understanding solar geometry, thermal performance specifications, and the trade-offs between views, light, and energy efficiency. Generic advice about “maximizing natural light” doesn’t help – specific numbers and decision frameworks do.
Solar Orientation: Quantifying the Difference
Window orientation fundamentally determines solar heat gain and daylight availability. The differences aren’t subtle.
Annual solar radiation by orientation (mid-latitude US):
South-facing: 1,400-1,600 kWh/m² annually East/West-facing: 900-1,100 kWh/m² North-facing: 400-500 kWh/m²
South-facing windows receive roughly 3x the solar energy of north-facing windows. This matters tremendously for both heating benefit (winter) and cooling load (summer).
Seasonal variation (40° latitude):
Winter solstice: South-facing receives 5x more direct sun than north Summer solstice: South-facing receives 2x more sun than north (sun higher in sky)
This seasonal variation allows architectural control through overhangs–block high summer sun while admitting low winter sun.
Practical implications by climate:
Heating-dominated climates (6000+ heating degree days):
- Maximize south-facing glazing: 18-25% of south wall area
- Minimize north-facing: limit to 8-12% (enough for views/ventilation, not more)
- East/west moderate: 10-15% (morning/evening light without excessive gain)
Calculation example: 400 sq ft south wall can accommodate 70-100 sq ft of glazing. Same-size north wall should have 30-50 sq ft maximum.
Cooling-dominated climates (1500+ cooling degree days):
- Limit south-facing: 10-15% (with mandatory shading)
- Avoid west-facing windows when possible (hardest to shade, afternoon sun peak cooling load)
- North-facing provides consistent diffused light: 12-18% acceptable
- East-facing manageable: 12-18% (morning sun less problematic than afternoon)
Why west windows are problematic: Afternoon sun coincides with peak outdoor temperatures (3-5pm). West-facing glass creates maximum cooling load exactly when HVAC systems are already stressed. Vertical exterior shading on west windows is geometrically difficult–sun angle makes effective shading require deep projections or movable systems.
Window-to-Floor Ratio: The Numbers That Work
The “ideal” glazing percentage depends on climate, room function, and priorities. Generic 15-20% recommendations oversimplify significantly.
By climate zone:
Cold climates (heating-dominated): Total home: 12-18% of floor area as glazing
- Concentrate south: up to 25% of south-wall floor area
- Restrict north: 8-10% of north-wall floor area
- Energy cost impact: properly oriented 15% total glazing uses 20-30% less heating than same percentage oriented poorly
Hot climates (cooling-dominated): Total home: 10-15% of floor area as glazing
- Distribute carefully: avoid large west-facing expanses
- SHGC becomes more critical than U-value
- Energy impact: 18% glazing with poor orientation can increase cooling costs 40-60% versus 12% with good orientation
By room function:
Living spaces (comfort priority): 15-20% window-to-floor ratio provides good daylight without excessive heat loss Example: 300 sq ft living room – 45-60 sq ft glazing (two 3’�–8′ windows or one large 6’�–8′)
Bedrooms (privacy + comfort balance): 10-15% ratio maintains privacy while providing adequate daylight Example: 180 sq ft bedroom – 18-27 sq ft glazing (one 3’�–6′ or 4’�–6′ window)
Bathrooms (privacy priority): 5-10% ratio, typically high placement for privacy Example: 50 sq ft bathroom – 3-5 sq ft glazing (one 2’�–2′ high window or transom)
Kitchens (wall space + light balance): 12-18% with careful placement to preserve cabinet wall area Example: 150 sq ft kitchen – 18-27 sq ft glazing (one 4’�–6′ over sink, one 3’�–3′ clerestory)
The cost reality: Each 1% increase in window-to-floor ratio adds roughly $60-120 per square foot of floor area to construction costs (including windows, installation, and additional structural requirements). Going from 12% to 18% glazing in a 2,000 sq ft home adds $7,200-14,400 to construction budget.
Overhang Design: Geometry That Actually Works
Overhangs control seasonal solar exposure. The calculations aren’t complex, but they’re latitude-specific.
Overhang depth formula:
Overhang depth = Window height �– tan(solar altitude at summer solstice)
For common US latitudes:
30° latitude (Houston, Jacksonville): 24″ overhang for 6-foot window 35° latitude (Albuquerque, Memphis): 20″ overhang for 6-foot window
40° latitude (Denver, Philadelphia): 18″ overhang for 6-foot window 45° latitude (Minneapolis, Portland OR): 15″ overhang for 6-foot window
These dimensions block noon sun during summer (sun angle 70-85° above horizon) while admitting noon sun during winter (sun angle 20-35° above horizon).
Practical constraints:
Overhangs over 24″ deep require additional structural support–not just extended rafters Wind loading increases with projection–local code may limit cantilever length Overhang above windows blocks some sky view even in winter–reduces total daylight Cost: structural overhang adds $40-80 per linear foot versus standard eave
When overhangs don’t work well:
East and west windows (sun at low angle morning/evening–overhang ineffective) North windows (no direct sun to block) Small windows where overhang would block too much total daylight Locations where summer cooling not a priority (overhangs add cost without benefit)
Alternative shading: interior cellular shades ($80-150 per window) or exterior roll shutters ($300-600 per window) provide flexible seasonal control without permanent structure.
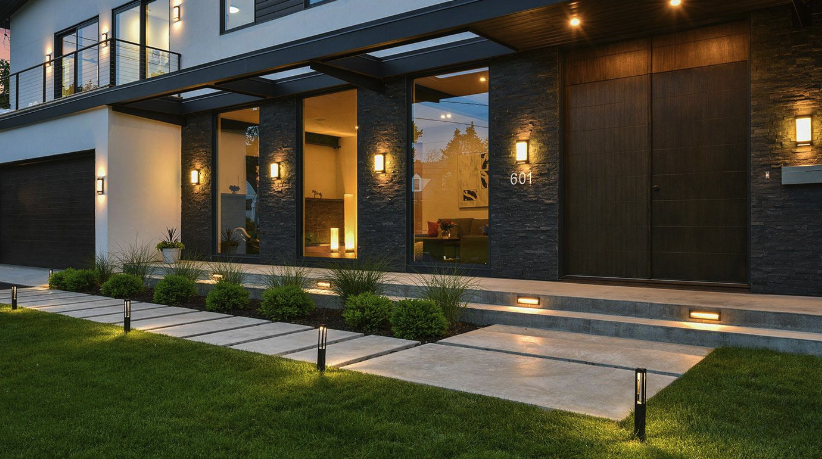
Clerestory Windows: The Installation Reality
Clerestory windows–placed high on walls above eye level–allow light penetration while maintaining privacy. The concept works, but implementation is more complex than standard windows.
Typical specifications:
Height: 12-24 inches tall Placement: starting 6-7 feet above floor (top near ceiling) Length: can span multiple feet along wall Purpose: indirect lighting, cross-ventilation if operable
Performance benefits:
Light distribution: allows daylight to reach 10-15 feet into room versus 8-10 feet for standard window height Privacy: viewing angle prevents sight lines in/out Ceiling bounce: light hits ceiling and distributes throughout space (creates more even illumination)
Installation cost premium:
Standard window 3’�–6′: $400-600 installed Clerestory window same size: $700-1,000 installed
The premium comes from:
- Scaffolding or lift equipment for installation access
- More complex framing (header must support load above existing ceiling line)
- Integration with roof structure/trusses
- Difficulty running flashing and weatherproofing at awkward height
Operational considerations:
Fixed clerestory (non-operable): standard installation complexity Operable clerestory: requires manual pole operator ($100-200) or motorized system ($800-1,500) because height prevents normal operation
Exterior cleaning: requires ladder or expensive professional service (figure $50-100 per window every 2-3 years versus $10-20 for ground-level windows you clean yourself)
When clerestory windows make sense:
Rooms where privacy matters but daylight needed (bathrooms, bedrooms facing adjacent property) Deep floor plans requiring light penetration beyond standard window reach Two-story spaces where high windows illuminate upper portion New construction where structural integration is straightforward
When standard windows work better:
Spaces where views matter (clerestory provides light but no view) Retrofit projects (structural complexity and cost often prohibitive) Rooms with adequate daylight from standard window placement Budgets where the 40-60% cost premium doesn’t justify the benefit
Glazing Selection: Performance vs Cost
Glazing choice affects both thermal performance and total window cost significantly.
U-value ranges (heat transfer–lower is better):
Single-pane clear: U-0.85 to 0.95 Double-pane clear: U-0.48 to 0.52 Double-pane Low-E + argon: U-0.28 to 0.32 Triple-pane Low-E + argon: U-0.18 to 0.22 Triple-pane Low-E + krypton: U-0.15 to 0.18
SHGC ranges (solar heat gain coefficient–context-dependent optimal value):
Clear glass: SHGC 0.70-0.85 (admits maximum solar heat) Tinted glass: SHGC 0.40-0.60 (reduces heat and light) Low-E standard: SHGC 0.30-0.40 (moderate heat rejection) Spectrally selective Low-E: SHGC 0.25-0.35 (rejects heat, transmits light better)
VT (visible transmittance–percentage of light passing through):
Clear double-pane: VT 0.75-0.80 Low-E double-pane: VT 0.50-0.60 Triple-pane Low-E: VT 0.45-0.55
Triple-pane reduces light transmission approximately 10% versus double-pane due to additional glass surface and coatings.
Cost progression:
Double-pane clear: baseline cost Double-pane Low-E + argon: +15-25% Triple-pane Low-E + argon: +40-60% Triple-pane Low-E + krypton: +50-75%
Climate-specific optimization:
Cold climates (heating priority):
- U-value critical: target 0.28 or lower (triple-pane often justified)
- SHGC moderate-to-high on south windows: 0.35-0.50 (capture solar gain)
- SHGC low on east/west windows: 0.30-0.40 (limit excess gain)
- North windows: focus on U-value only (no direct sun, SHGC irrelevant)
Hot climates (cooling priority):
- SHGC critical: target 0.30 or lower all orientations
- U-value less critical: 0.32-0.40 adequate (double-pane Low-E sufficient)
- VT matters: spectrally selective Low-E maintains light while rejecting heat
- West windows: SHGC 0.25-0.28 minimum (highest heat load)
Payback calculation example:
2,000 sq ft home, 300 sq ft glazing, upgrading from double-pane clear (U-0.50) to double-pane Low-E/argon (U-0.30):
Cold climate (5000 HDD): saves roughly 3,000 kWh/year = $300-450/year Hot climate (1500 CDD): saves roughly 800 kWh/year = $120-180/year
Upgrade cost: approximately $2,400-4,500 for entire house Payback: 5-15 years depending on climate and energy costs.
Thermal Mass Integration: What Actually Works
Thermal mass–materials that absorb and store heat–can moderate indoor temperature swings when properly positioned relative to solar gain.
Materials and heat capacity:
Concrete: 0.88 kJ/kg·K, density 2,400 kg/m³ Brick: 0.84 kJ/kg·K, density 1,920 kg/m³
Tile over concrete: combines thermal mass with high-absorptivity surface Water: 4.18 kJ/kg·K (highest capacity but requires containment)
Effective specifications:
Thickness: 4-6 inches minimum for concrete/brick (thinner doesn’t store enough heat) Distance from window: within 3-4 feet of direct sun (beyond this distance, radiant heat doesn’t reach effectively) Surface treatment: darker colors absorb 70-80% more radiant heat than light colors Thermal lag: concrete has 8-10 hour delay (absorbs day heat, releases evening/night)
Practical application:
Concrete slab floor in sunroom with south-facing glass:
- 6″ concrete receives winter sun, stores heat, releases overnight
- Keeps space 5-8°F warmer at night than without thermal mass
- Reduces heating requirement during occupied evening hours
Installation requirements:
Structural load: 6-inch concrete adds 75 lb/sq ft–requires appropriate floor structure Thermal envelope: mass must be within insulated space (exterior mass doesn’t help interior) Insulation below: concrete slab needs sub-slab insulation (otherwise heat conducts to ground) Cost: 6-inch concrete slab adds $8-12 per square foot versus standard framing
When thermal mass makes sense:
New construction with slab-on-grade foundation (relatively easy to integrate) Passive solar design with significant south glazing (provides heat to store)
Climates with large diurnal temperature swings (thermal mass moderates peak/valley) Spaces occupied during evening hours (released heat matches occupancy pattern)
When thermal mass doesn’t justify cost:
Retrofit projects (adding mass requires significant structural work) Climates with small daily temperature variation (thermal mass provides minimal benefit) Homes with minimal solar gain (no heat to store) Cooling-dominated climates (thermal mass can work against you by retaining unwanted heat)
Making Decisions Based on Your Priorities
No single window strategy works for every home. Prioritize based on actual needs:
If heating cost is primary concern (cold climate):
- Maximize south-facing glazing (18-25% of south wall)
- Invest in triple-pane windows (U-0.20 or better)
- Minimize north windows (views only, not more)
- SHGC 0.40+ on south (capture winter sun)
If cooling cost is primary concern (hot climate):
- Minimize west-facing glass (or use SHGC 0.25 minimum)
- Overhangs on south windows (or movable exterior shading)
- SHGC 0.25-0.30 all orientations
- Double-pane Low-E adequate (don’t overspend on triple)
If natural light is priority (dark existing spaces):
- Focus on room-specific window-to-floor ratios
- Consider clerestory in deep floor plans
- Balance VT and thermal performance (spectrally selective Low-E)
- North-facing provides consistent diffused light without heat gain issues
If views matter most:
- Align large windows with actual views (even if orientation isn’t ideal)
- Compensate poor orientation with better glazing specs
- Plan for summer shading on west-facing view windows
- Accept that views may cost more in energy than optimal orientation
If budget is constrained:
- Prioritize window placement over premium glazing (orientation matters more)
- Double-pane Low-E provides 80% of triple-pane benefit at 60% of cost
- Interior shading cheaper than overhangs for seasonal control
- Focus glazing budget on most-occupied spaces
Windows affect heating and cooling costs, natural light quality, and comfort. Getting placement and specifications right requires understanding actual performance numbers–U-values, SHGC, orientation differences–and making informed trade-offs between views, light, thermal performance, and budget. Companies like OKNOPLAST offer windows with European engineering quality that can achieve U-0.20 or better when properly specified, but even the best windows can’t compensate for poor orientation or inappropriate sizing.
Start with your climate and priorities, calculate appropriate window-to-floor ratios for each orientation, then select glazing specifications that match your performance requirements and budget constraints.